Static electricity is a silent threat in many workplaces. One tiny spark can fry sensitive electronics, cause data loss, or even ignite flammable materials. That’s why you installed an Electrostatic Discharge (ESD) floor in the first place. But here is the catch: if you don’t clean it properly, it stops working.
Dirt acts as an insulator. When grime builds up on your conductive floor, it blocks the path to ground, rendering your expensive ESD protection useless.
If you are wondering how to clean an ESD floor without damaging its unique properties, you are in the right place. This guide covers everything from daily maintenance to deep cleaning, ensuring your facility stays safe and static-free.
Why Specialized Cleaning Matters
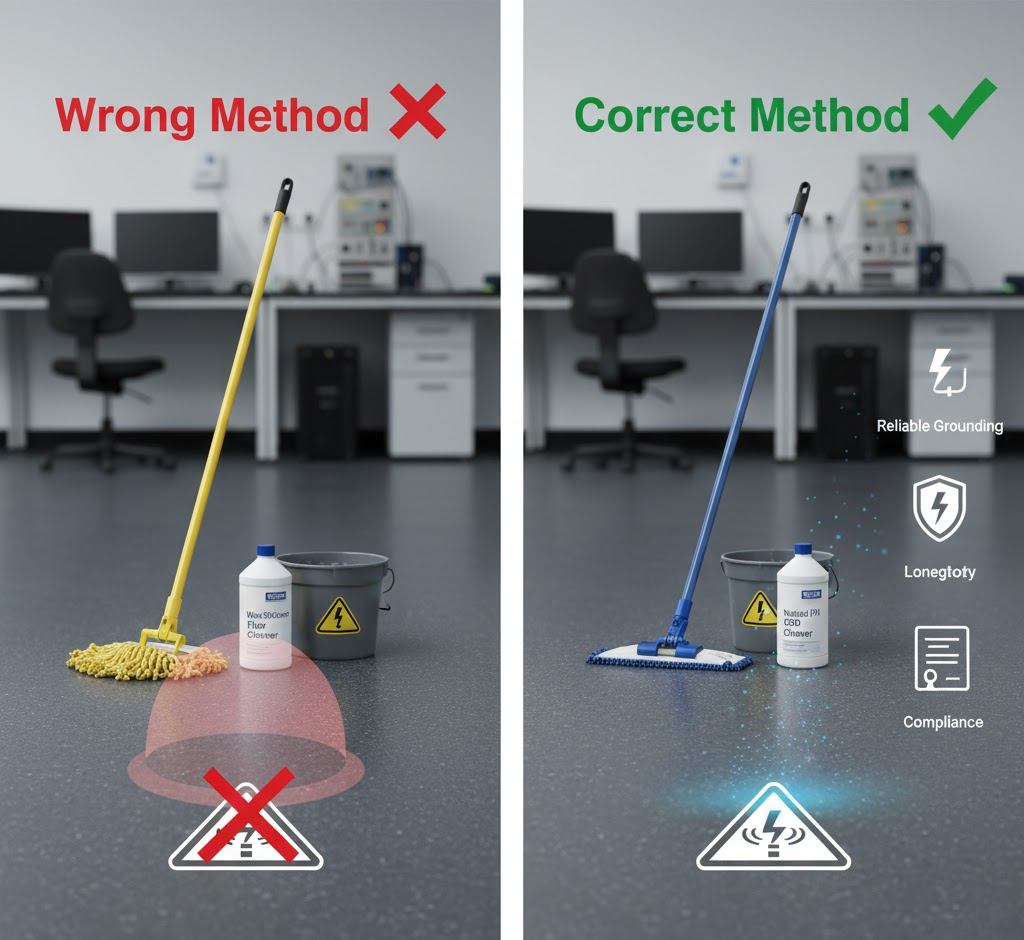
You might be tempted to grab a mop and a bucket of standard floor cleaner, but stop right there. Regular cleaning products often contain additives like wax or silicone. These leave a residue that insulates the floor, effectively turning off its static-control capabilities.
Cleaning an ESD floor isn’t just about making it look shiny; it’s about maintaining its electrical conductivity. Proper maintenance ensures:
- Reliable Grounding: Electricity can flow harmlessly through the floor to the ground.
- Longevity: You protect your investment and avoid costly replacements.
- Compliance: You meet industry standards for static control environments.
Tools and Materials You Will Need
Before you start, gather the right supplies. Using the wrong tools is the fastest way to ruin an ESD floor.
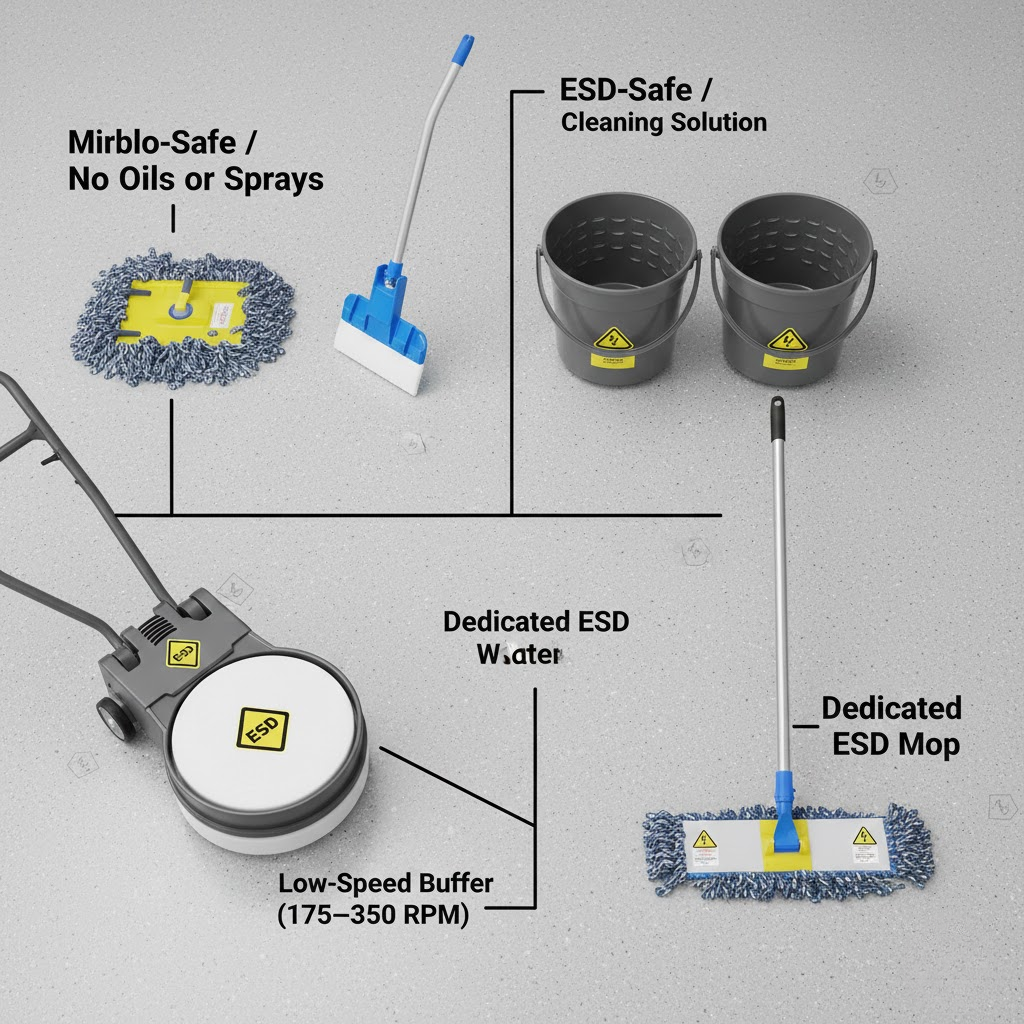
Recommended Equipment
- Dust Mop: Use untreated cotton or microfiber. Avoid mops treated with oils or sprays.
- Two Buckets: One for the cleaning solution and one for clean rinse water.
- Mop: A dedicated rayon or cotton blend mop reserved only for your ESD floors.
- Low-Speed Buffer: If you plan to buff the floor, use a machine running at low RPM (175-350 RPM) with a white or red pad.
The Right Cleaning Solution
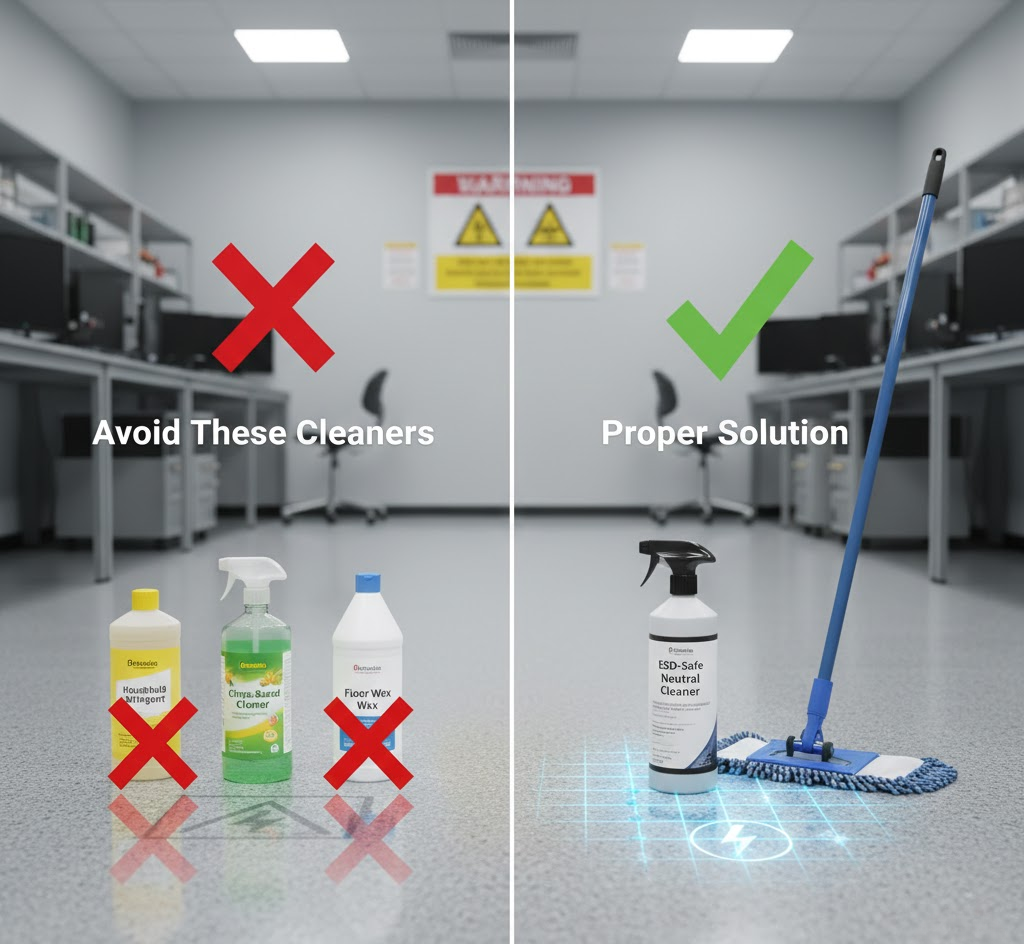
This is critical. You must use a designated ESD floor cleaner. These solutions are specifically formulated to lift dirt without leaving an insulative residue. They often contain anti-static agents that rejuvenate the floor’s performance.
What to Avoid:
- Never use household detergents.
- Avoid citrus-based cleaners.
- Stay away from ammoniated cleaners.
- Never use standard floor wax.
Step-by-Step: How to Clean an ESD Floor
Let’s walk through the process to get your floors sparkling clean and fully functional.
1. Daily Maintenance: Sweep and Dust
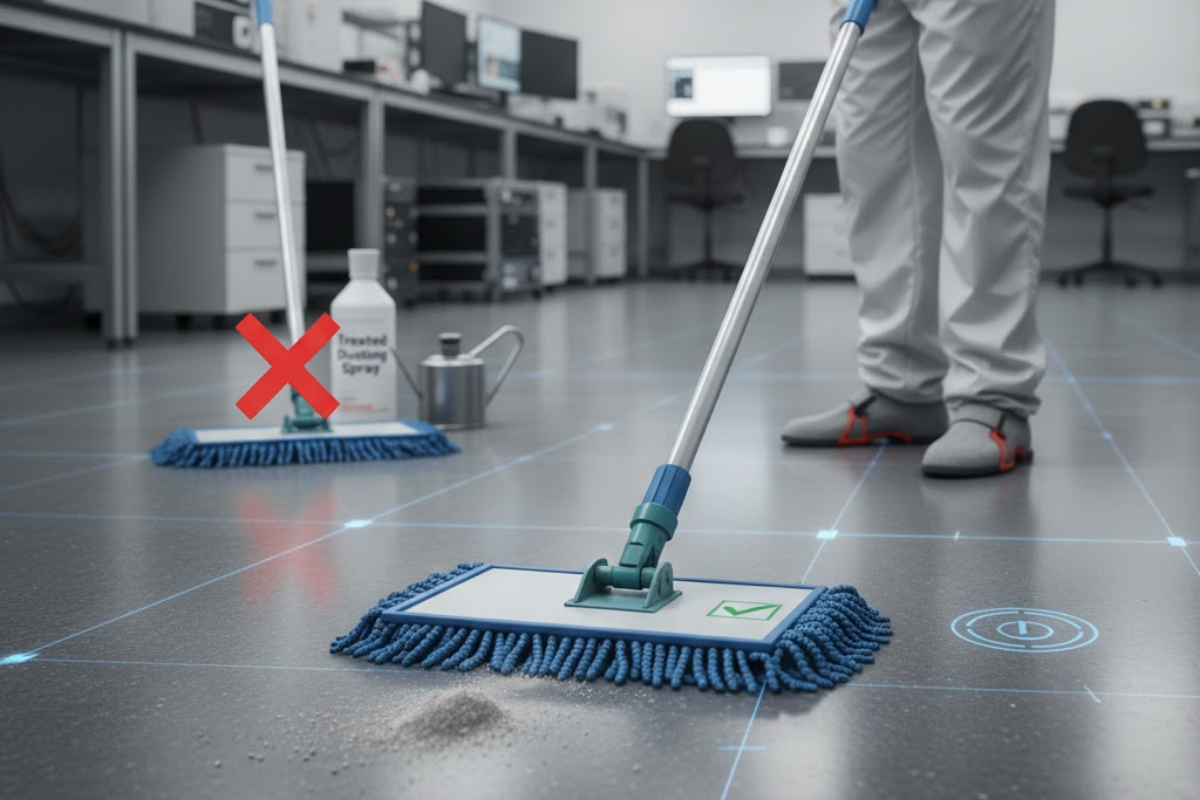
The biggest enemy of an ESD floor is dry particulate soil—dust and dirt. This debris creates a barrier between the floor and the shoe grounders worn by your staff.
- Action: Sweep or dry mop the entire area daily.
- Tip: Use a microfiber dust mop that traps particles rather than pushing them around. Do not use dust mop treatments or sprays, as these leave oily residues.
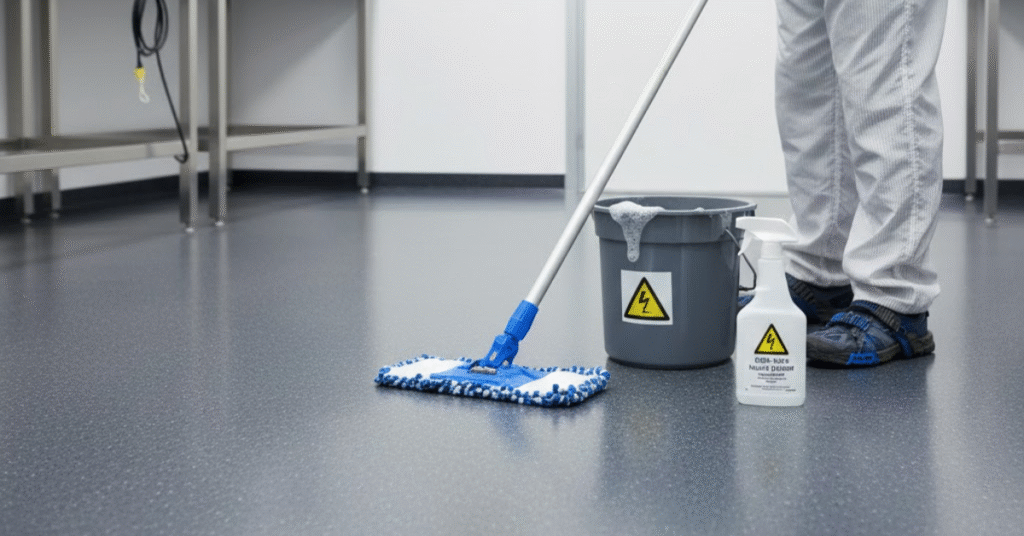
2. Weekly Maintenance: Damp Mopping
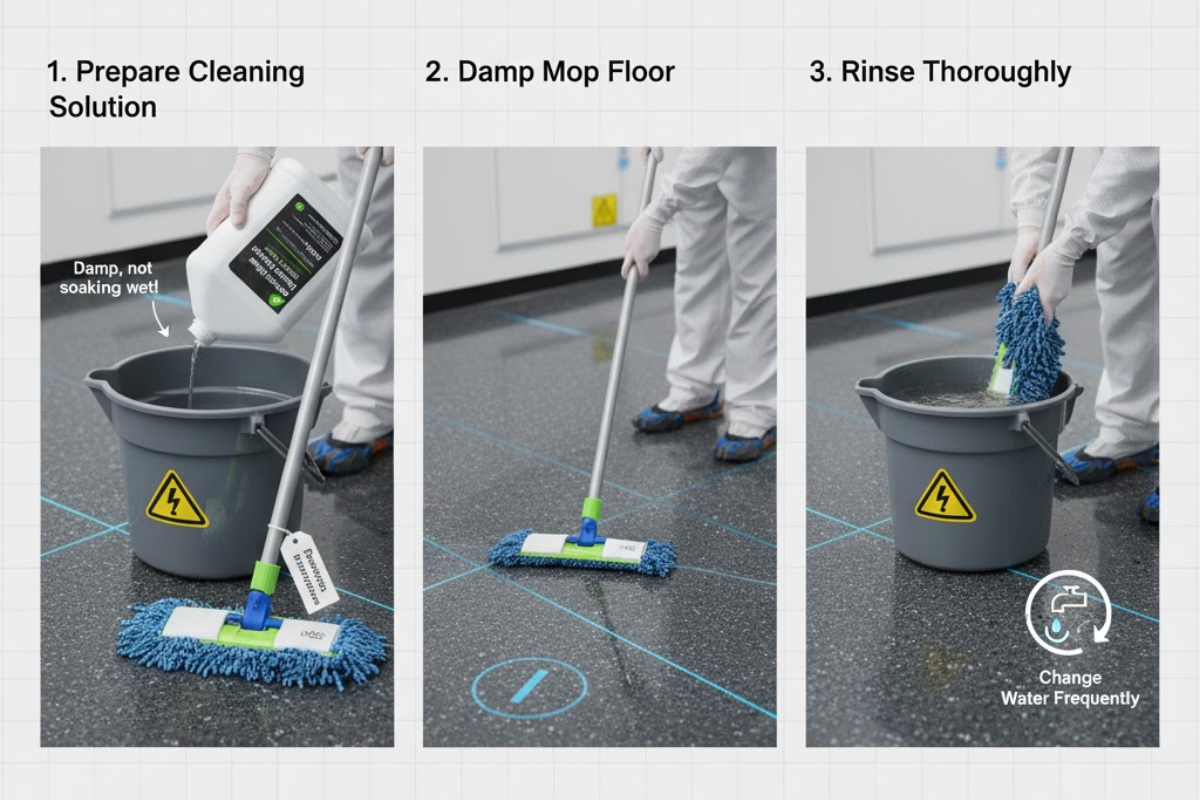
Sweeping removes loose debris, but mopping tackles the stuck-on grime.
- Prepare: Mix your ESD floor cleaner with cool water according to the manufacturer’s dilution ratio. Using too much soap can leave a film; using too little won’t clean effectively.
- Mop: Dip your mop into the cleaning solution and wring it out well. You want to clean the floor, not flood it.
- Rinse (Crucial Step): If your cleaner requires rinsing (check the label), use a separate bucket of clean, cool water to rinse the floor. Change the rinse water frequently to ensure you aren’t just spreading dirty water back onto the surface.
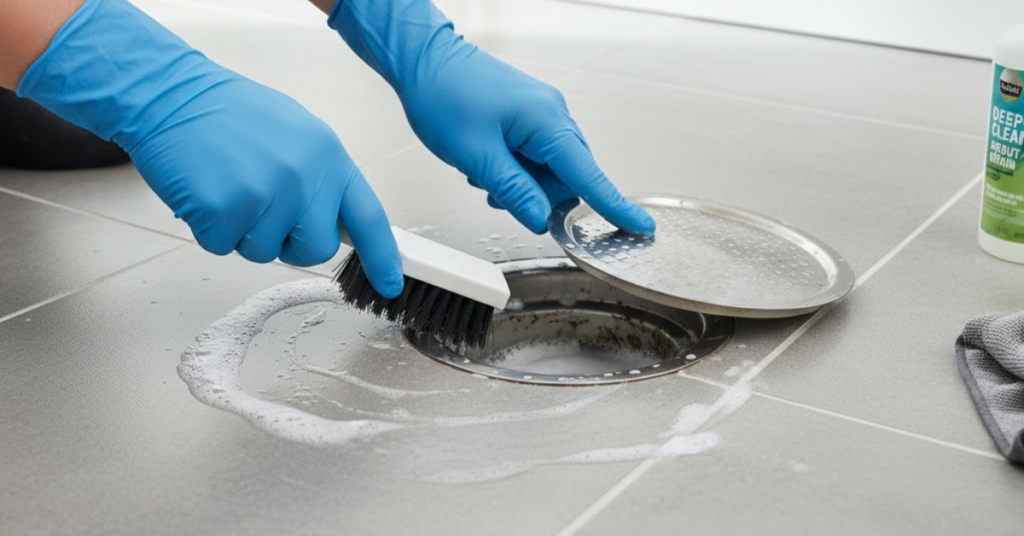
3. Removing Stubborn Stains
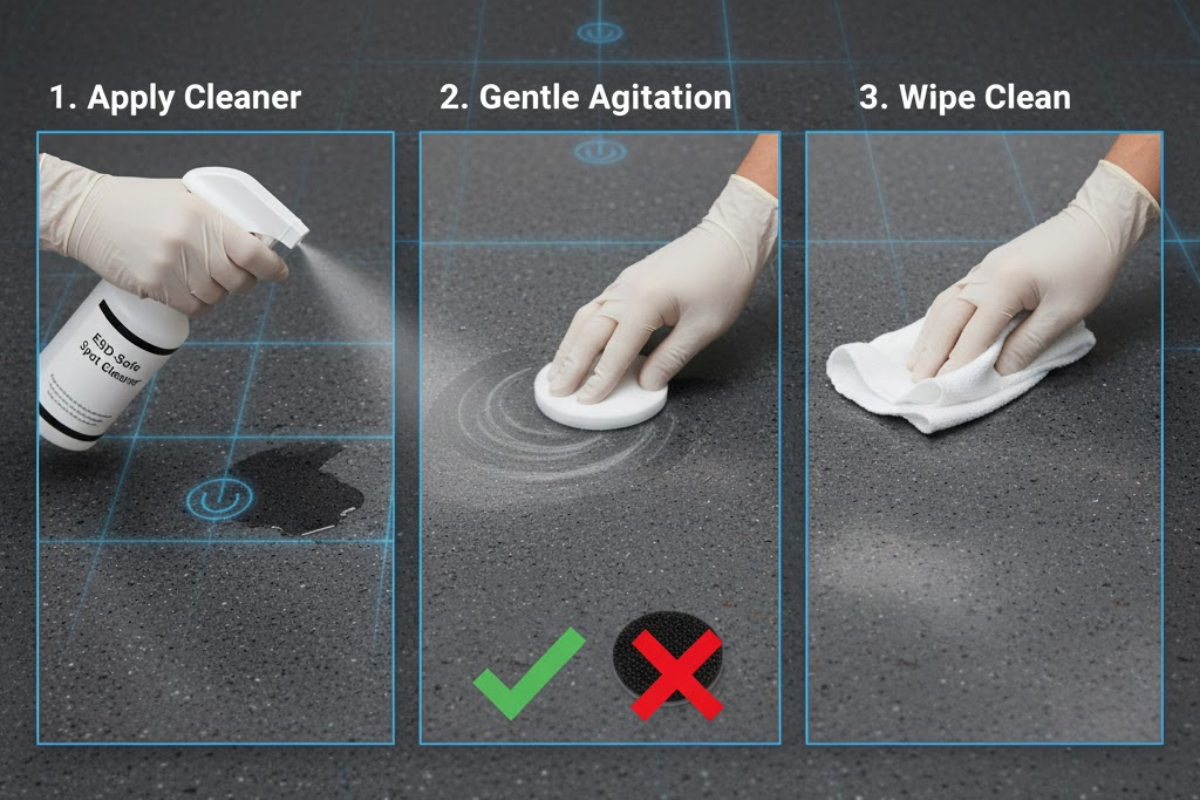
Scuff marks from shoes or cart wheels are inevitable.
- Action: Spray a small amount of ready-to-use ESD cleaner directly on the mark. Let it sit for a moment, then gently agitate with a soft pad or cloth. Wipe clean.
- Warning: Do not use abrasive scrubbing pads (like black pads) as they can scratch the surface and damage the conductive matrix of the tile.
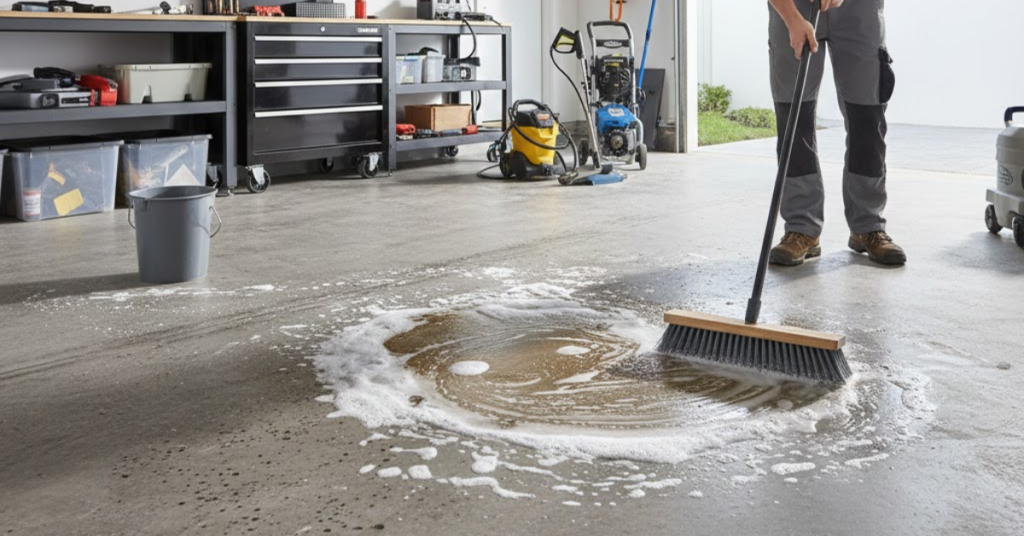
4. Deep Cleaning and Restoring
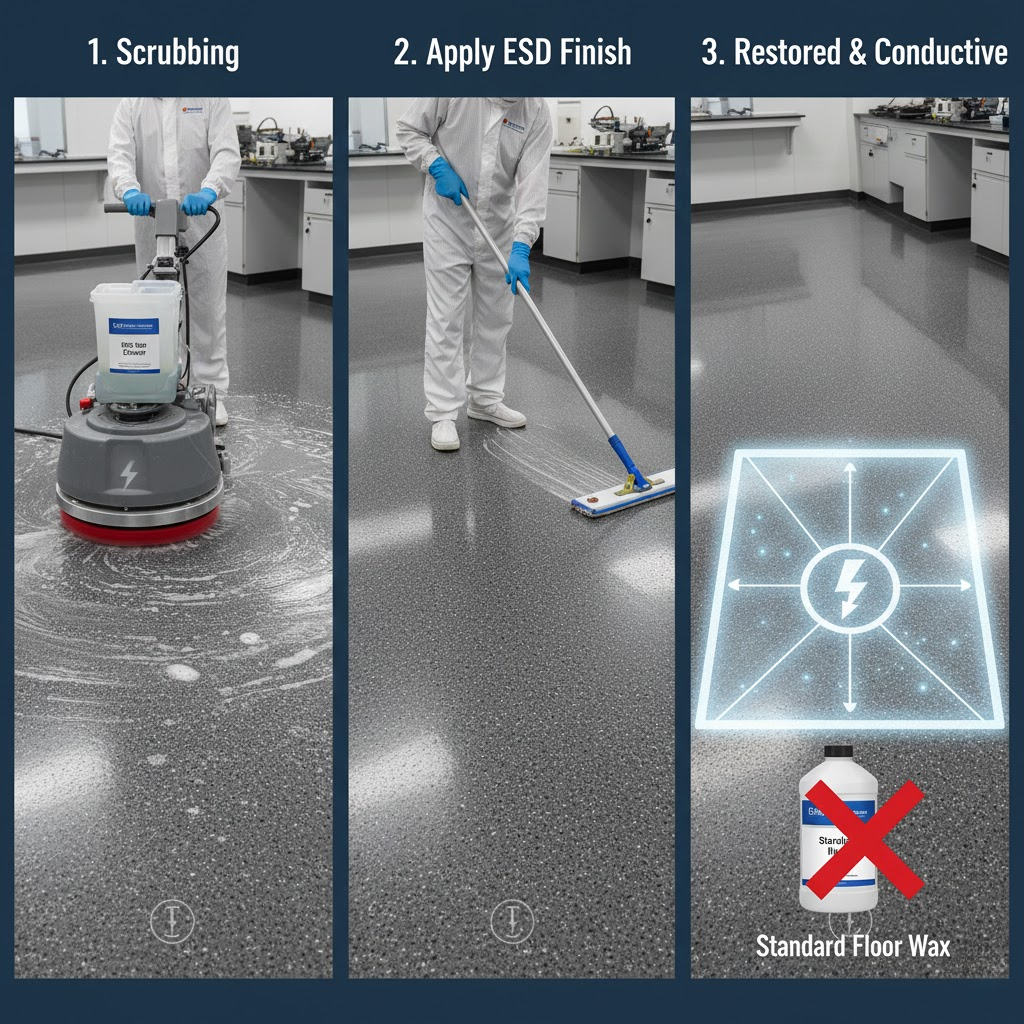
Over time, even with good mopping, a floor can look dull.
- Scrubbing: Use an auto-scrubber or a rotary floor machine with a red pad and ESD cleaner to give the floor a deep clean.
- Finishing: If your floor requires an ESD finish (wax), apply a thin coat of static dissipative floor finish. This is different from standard floor wax. Standard wax is an insulator; ESD finish is conductive.
Common Mistakes to Avoid
We see these errors all the time. Make sure your cleaning crew knows what not to do.
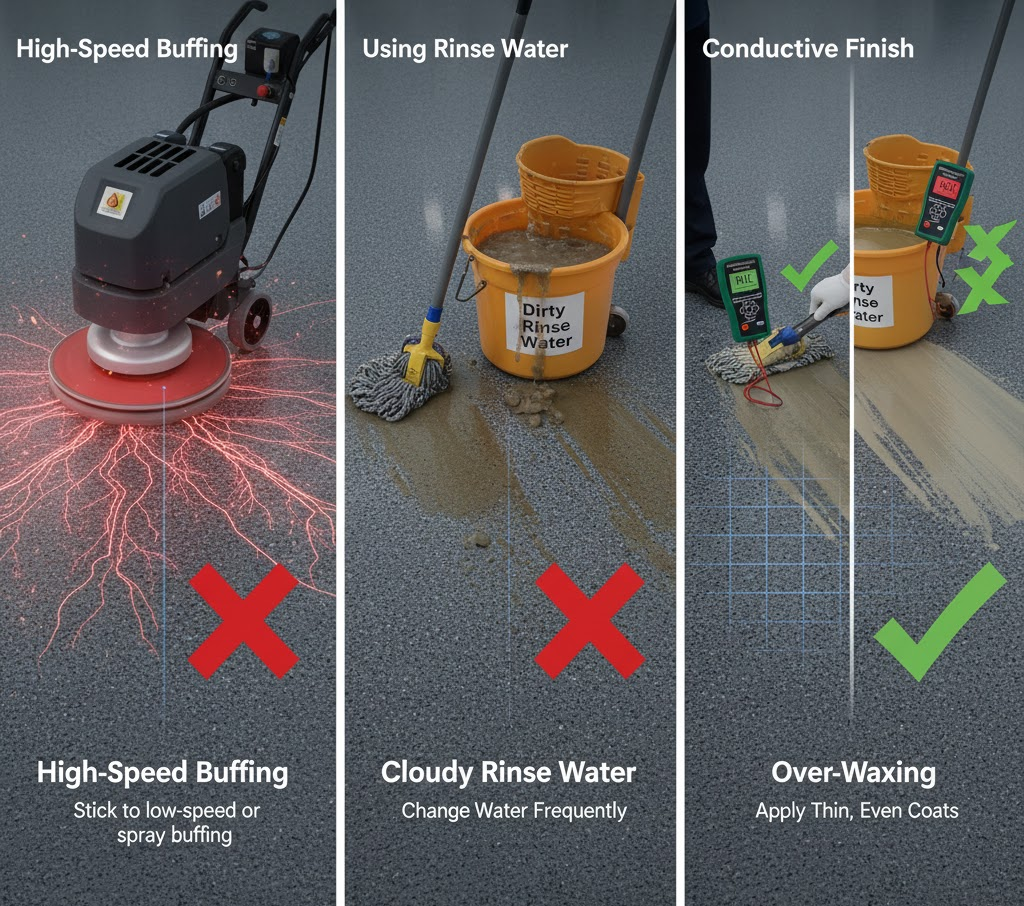
Using High-Speed Buffing
High-speed burnishing creates heat. This heat can melt or fuse the conductive veins in vinyl ESD tiles, destroying their ability to ground a charge. Always stick to low-speed buffing or spray buffing.
Using Cloudy Water
If your rinse water looks like mud, you aren’t cleaning; you are redistributing dirt. Change your water buckets often.
Over-Waxing
More isn’t always better. If you apply ESD finish, keep the layers thin. Too many layers can actually reduce the conductivity of the floor, causing resistance readings to drift out of spec.
How to Test Your Floor
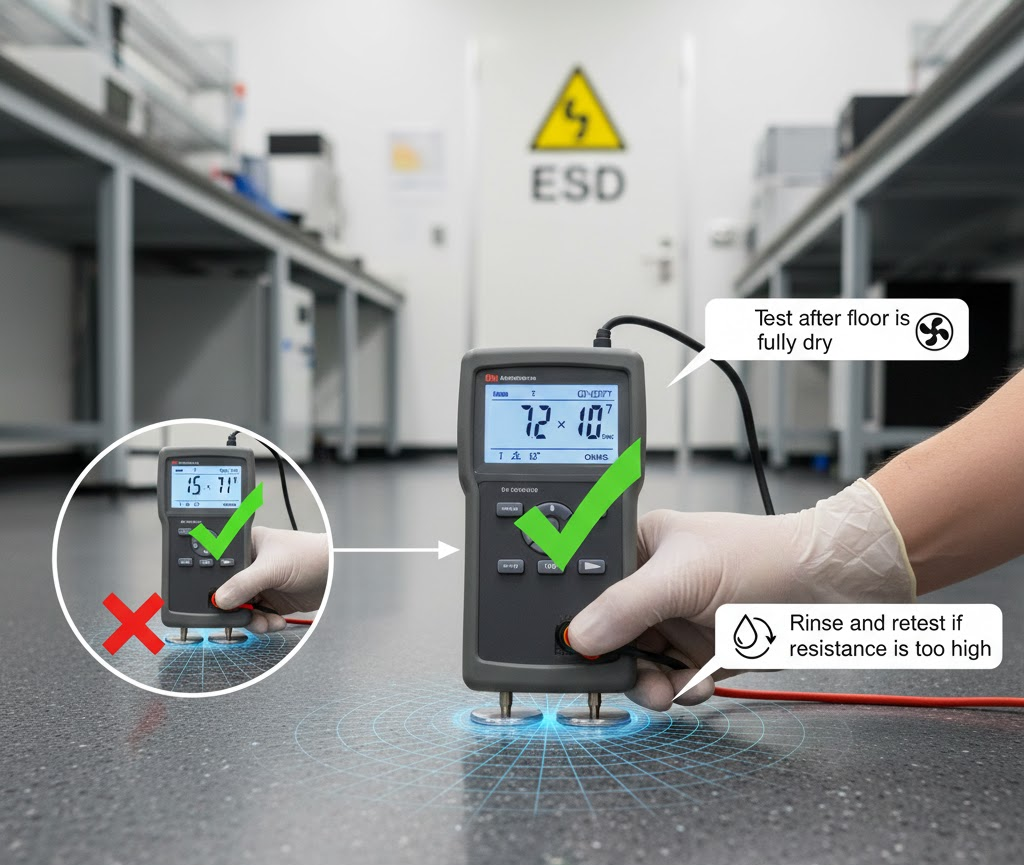
Cleaning is only half the battle. You need to verify that your cleaning process worked. Ideally, you should test the floor’s electrical resistance regularly using a megohmmeter.
- When to test: Wait until the floor is completely dry after cleaning.
- What to look for: Ensure the resistance readings fall within your required range (typically between $1.0 \times 10^5$ and $1.0 \times 10^9$ ohms).
If the resistance is too high after cleaning, you likely have a residue problem. Rinse the floor thoroughly with plain hot water and test again.
Keeping Your Floor in Top Shape
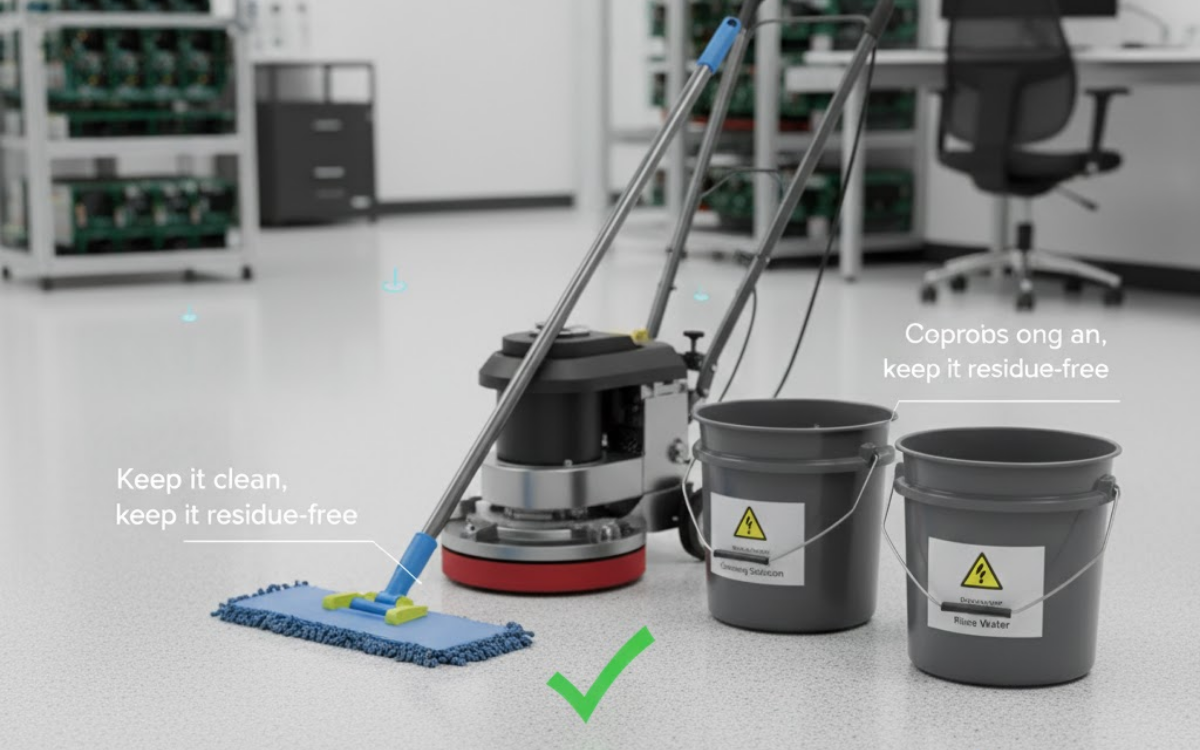
Maintaining an ESD floor doesn’t have to be a headache. By sticking to a routine and using the right products, you ensure that your investment protects your facility for years to come.
Remember the golden rule of ESD flooring: Keep it clean, keep it residue-free.
If you treat your floor right, it will return the favor by keeping your static-sensitive environment safe and productive.