Have you ever glanced down at your floor vents and noticed they’ve collected a layer of dust, pet hair, and other mystery debris? It’s easy to overlook them during regular cleaning routines, but those small grates play a big role in your home’s air quality and HVAC system efficiency. Keeping them clean is a simple task that makes a significant difference.
This guide will walk you through everything you need to know about how to clean floor vents effectively. We’ll cover why it’s so important, the tools you’ll need, and a step-by-step process for a deep clean. You’ll be breathing easier in no time.
Why You Should Clean Your Floor Vents Regularly
Cleaning your floor vents is about more than just appearances. This small chore has a major impact on your home’s environment and your wallet.
Better Indoor Air Quality
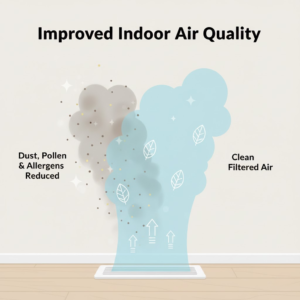
Your HVAC system circulates air throughout your home, and that air passes directly through your vents. When vents are clogged with dust, dirt, dander, and allergens, these particles get blown back into the air you breathe. Regular cleaning helps reduce airborne irritants, which is especially important for anyone with allergies, asthma, or other respiratory sensitivities.
Improved HVAC Efficiency
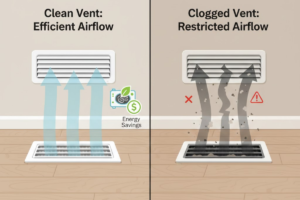
A clean vent is a happy vent. When your floor vents are obstructed by debris, your HVAC system has to work harder to push air through. This strain can lead to increased energy consumption and higher utility bills. By ensuring clear airflow, you help your system run more efficiently, potentially extending its lifespan and saving you money.
Prevents Mold and Mildew
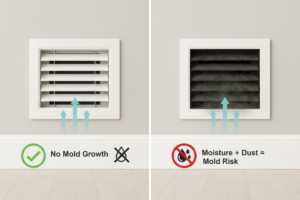
Dust and debris can trap moisture, creating an ideal breeding ground for mold and mildew within your ductwork. Cleaning your vents and the visible part of the ducts helps prevent this moisture buildup, protecting your home and your health from harmful spores.
Tools and Materials for Cleaning Vents
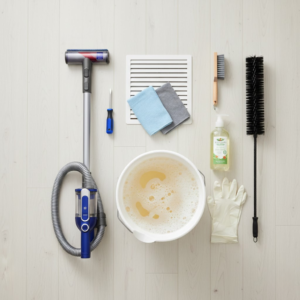
The good news is you probably already have most of the tools you need for this job. You don’t need any fancy equipment to get your floor vents sparkling clean.
Essential Tools:
- Vacuum cleaner with a hose and brush attachment
- Screwdriver (if your vent covers are screwed in)
- Microfiber cloths or cleaning rags
- A bucket
- Warm water
- Mild dish soap
Optional but Helpful:
- A soft-bristled brush (an old toothbrush or a small scrub brush works well)
- Gloves to keep your hands clean
- A long, flexible brush for reaching deeper into the ducts
A Step-by-Step Guide to Cleaning Floor Vents
Ready to get started? Follow these simple steps for a thorough cleaning. For best results, it’s a good idea to turn off your HVAC system at the thermostat before you begin.
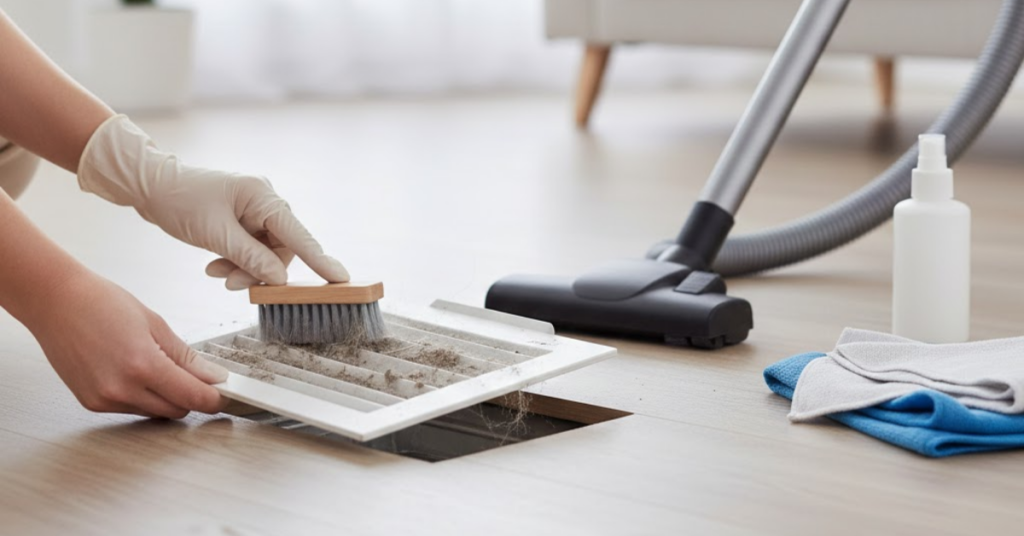
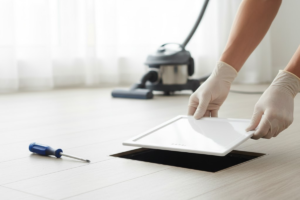
Step 1: Remove the Vent Covers
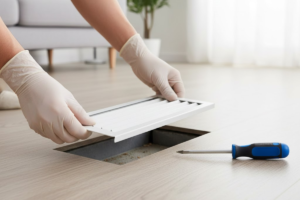
First, you need to remove the metal or plastic grates covering the vent openings. Most floor vents can simply be lifted out. Some may be held in place with one or two screws. If so, use your screwdriver to carefully remove them and set them aside somewhere safe.
Step-2: Initial Dust and Debris Removal
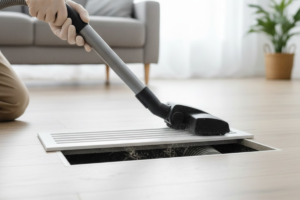
Before you start scrubbing, do a quick dry clean. Use your vacuum’s brush attachment to go over the surface of the vent covers, removing any loose dust and hair. This prevents you from turning that dust into a muddy mess when you add water.
Next, use the vacuum hose to clean out the inside of the ductwork as far as you can reach. You might be surprised by what you find in there, from pet toys to food crumbs. A long, flexible duct brush can help you dislodge stubborn debris that’s further down.
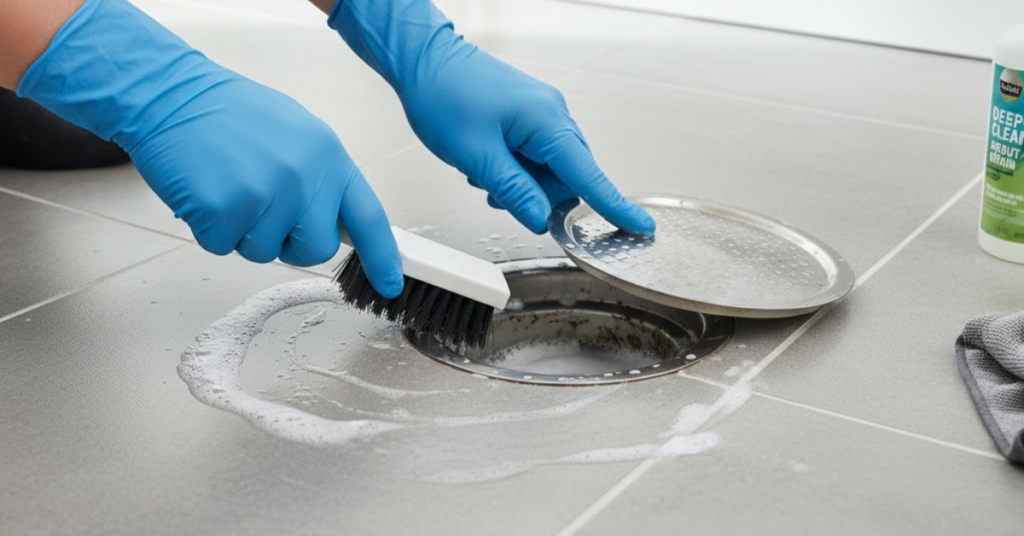
Step 3: Wash the Vent Covers
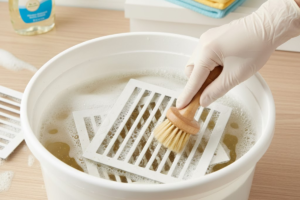
Now it’s time for a deep clean. Fill your bucket with warm water and a few drops of mild dish soap. Submerge the vent covers in the soapy water and let them soak for about 10-15 minutes. This will help loosen any caked-on grime.
After soaking, use a soft-bristled brush or a microfiber cloth to scrub the covers. Pay close attention to the slats and corners where dirt tends to accumulate. An old toothbrush is perfect for getting into these tight spaces.
Step 4: Rinse and Dry Thoroughly
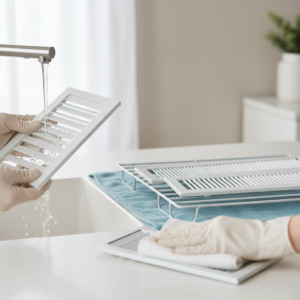
Once the vent covers are clean, rinse them thoroughly with clean water to remove all soap residue. This is a crucial step, as leftover soap can attract more dust.
After rinsing, dry the vent covers completely. You can wipe them with a dry microfiber cloth and then let them air dry. It is essential that they are 100% dry before you put them back in place, especially if they are metal. Any remaining moisture could lead to rust or encourage mold growth inside your ducts.
Step 5: Replace the Vent Covers
While the covers are drying, you can give the area around the duct opening one last pass with the vacuum. Once they are completely dry, place the vent covers back over the openings. If you removed any screws, secure them back in place. Now you can turn your HVAC system back on.
How Often Should You Clean Your Floor Vents?
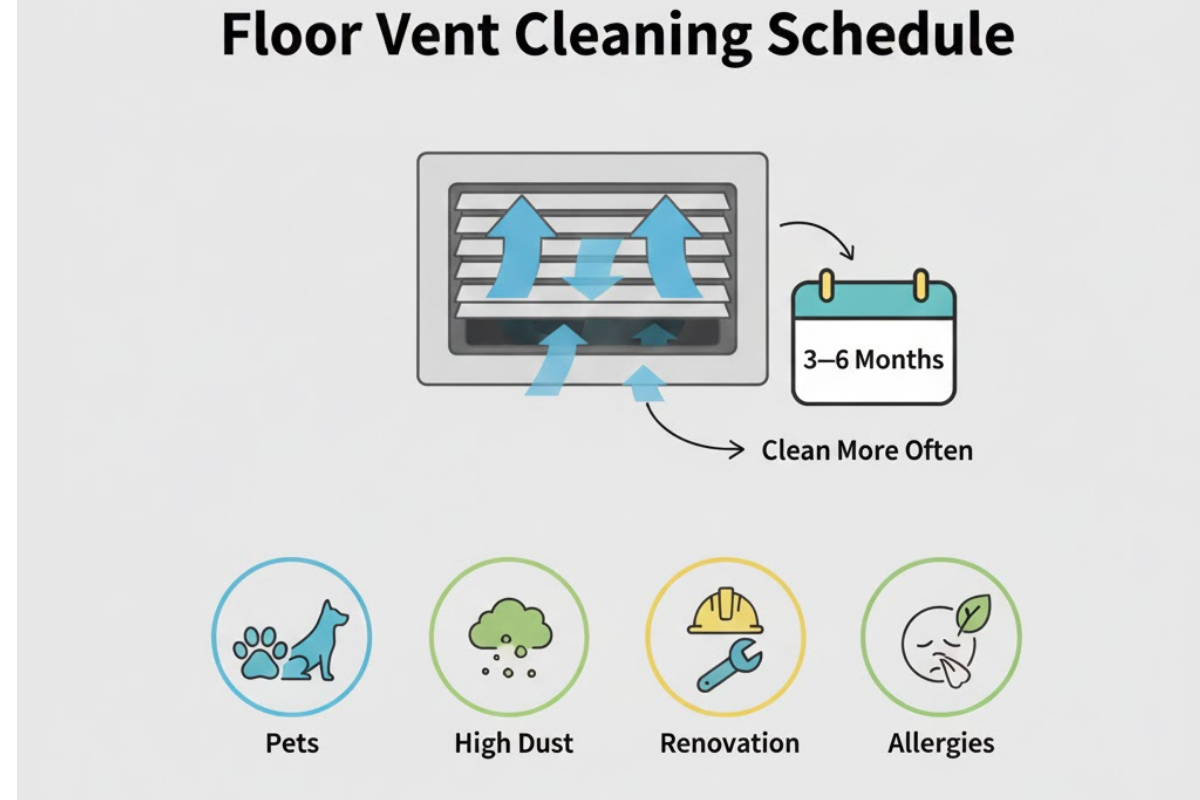
For most households, cleaning your floor vents every three to six months is sufficient. However, you may want to clean them more frequently if:
- You have pets that shed a lot.
- Someone in your home suffers from allergies or asthma.
- You live in a particularly dusty area.
- You’ve recently completed a home renovation project.
A good rule of thumb is to inspect them monthly. If you see visible dust buildup, it’s time for a cleaning.
Common Mistakes to Avoid
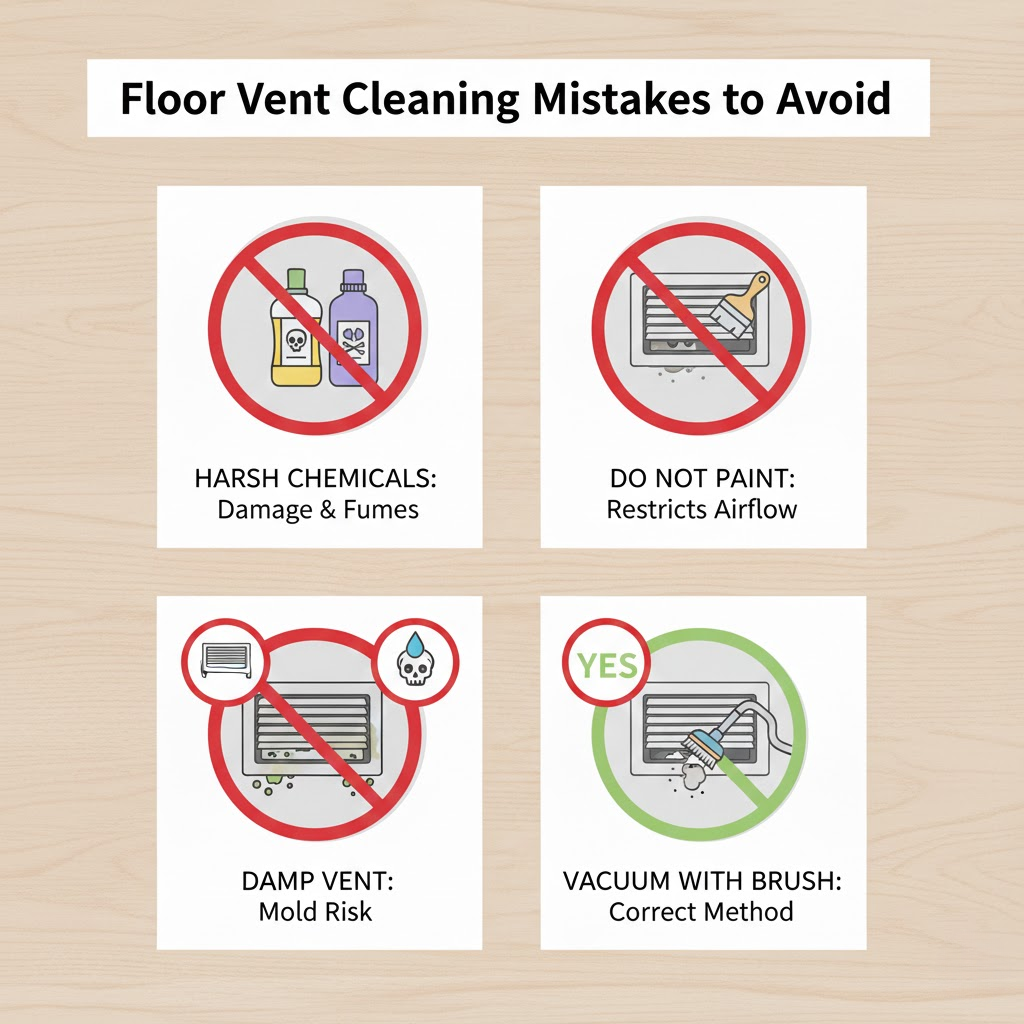
Cleaning floor vents is straightforward, but a few common missteps can cause problems.
- Using harsh chemicals: Avoid using abrasive cleaners, bleach, or other harsh chemicals on your vent covers. These can damage the finish, cause discoloration, or release harmful fumes into your home’s air supply. Mild soap and water are all you need.
- Painting over dirty vents: Never paint over a dusty or greasy vent cover. The paint won’t adhere properly and will likely chip and peel, making the vent look worse. Always clean and dry them thoroughly before painting.
- Forgetting to dry them completely: As mentioned, re-installing damp vent covers is a major mistake. This can lead to rust on metal vents and create a moist environment perfect for mold and mildew to thrive in your ductwork.
- Ignoring the ductwork: While you can’t clean your entire duct system yourself, don’t skip the step of vacuuming inside the vent opening. This removes a significant amount of debris that would otherwise just get blown around. For a full system cleaning, it’s best to call a professional HVAC service.
By following these tips, you can easily maintain clean floor vents, leading to a healthier, more comfortable, and more efficient home. It’s a small effort that delivers big rewards.