An area rug can tie a room together, adding warmth, color, and texture. But when it’s placed on a beautiful wood floor, cleaning it can feel a bit daunting. You want a spotless rug, but the last thing you need is a warped or discolored hardwood floor.
Don’t worry, it’s entirely possible to get your rug clean without harming the wood underneath. This guide will walk you through everything you need to know. We’ll cover how to prepare your space, different cleaning methods, and how to keep your floor safe throughout the process.
First Things First: Preparation is Key
Before you start scrubbing, a little prep work goes a long way. Taking these initial steps ensures a safer, more effective cleaning experience for both your rug and your floor.
1. Check the Rug’s Care Label
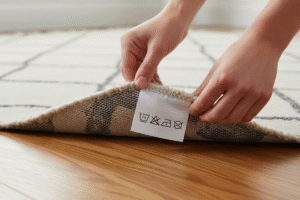
Your rug’s care label is your best friend. It contains specific instructions from the manufacturer about what cleaning methods and products are safe to use. Some materials, like wool or silk, require special care, while synthetic fibers are often more durable. Ignoring this label can lead to faded colors, shrunken fibers, or other irreversible damage. If there’s no label, it’s best to proceed with the gentlest methods first.
2. Move Furniture and Clear the Area
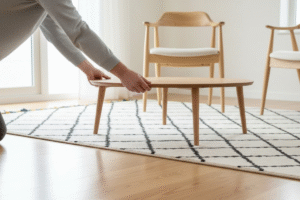
To clean the rug properly, you need clear access to the entire surface. Move any furniture, like coffee tables, chairs, or couches, off the rug. This not only makes cleaning easier but also prevents moisture from getting trapped under furniture legs, which could damage both the furniture and your wood floor.
3. Protect Your Wood Floor
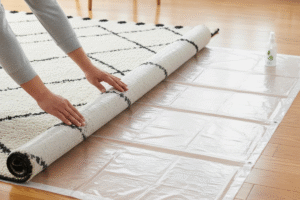
This is the most crucial step. Even with careful cleaning, some moisture can seep through the rug. To protect your hardwood floor from water damage, discoloration, or warping, you need a waterproof barrier.
Lay down a large, thick plastic tarp or several layers of heavy-duty plastic sheeting underneath the rug. Make sure the plastic extends several inches beyond the rug’s edges on all sides. This creates a reliable buffer that will catch any drips or cleaning solution that might otherwise reach your floor.
4. Give it a Good Vacuum
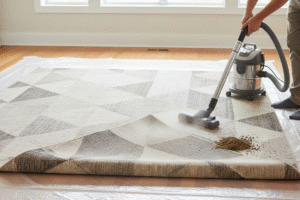
Before introducing any liquid, you need to remove as much dry dirt, dust, and debris as possible. Vacuum the rug thoroughly on both sides. Start with the top, then carefully roll it up, lay down your protective tarp, and unroll the rug upside down. Vacuuming the back helps dislodge embedded grit that can be abrasive to the fibers. Flip it back over and vacuum the top one last time.
Choosing Your Cleaning Method
With your space prepped, it’s time to clean. The right method depends on your rug’s material and how dirty it is. Here are a few reliable options, from a light refresh to a deep clean.
Method 1: Spot Cleaning for Minor Spills
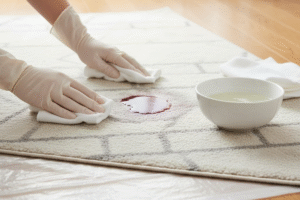
For small stains or spills, you don’t need to clean the entire rug. Acting quickly is essential.
What you’ll need:
- Clean, white cloths or paper towels
- A mild cleaning solution (DIY or store-bought)
- A bowl of clean water
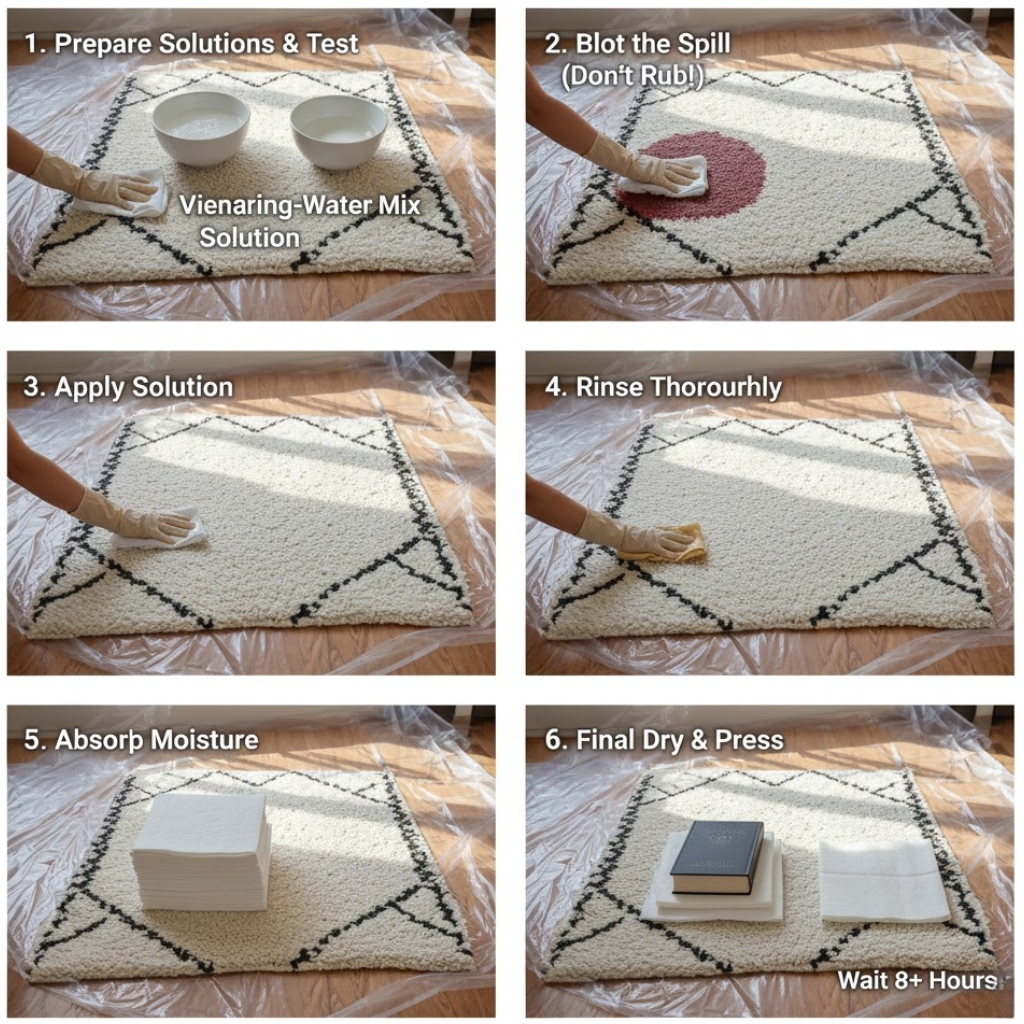
DIY Cleaning Solution:
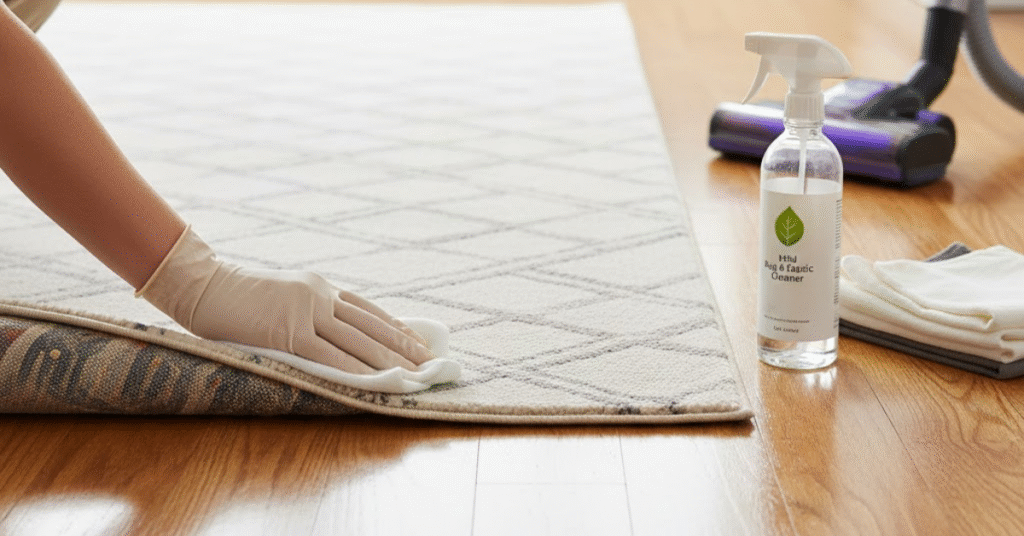
A simple and effective solution is a mixture of a few drops of clear dish soap and warm water. For tougher stains, you can try a solution of equal parts white vinegar and water. Always test your solution on a small, inconspicuous corner of the rug first to ensure it doesn’t cause discoloration.
Steps:
- Blot, Don’t Rub: As soon as a spill happens, use a clean cloth to blot the area. Start from the outside of the stain and work your way in to prevent it from spreading.
- Apply the Solution: Lightly dampen a fresh cloth with your chosen cleaning solution. Gently dab the stained area. Avoid oversaturating the rug.
- Rinse and Blot: Dampen another clean cloth with plain water and blot the area to “rinse” out the cleaning solution.
- Dry Thoroughly: Press a dry cloth or paper towel firmly onto the spot to absorb as much moisture as possible. You can also place a stack of paper towels on the spot with a heavy book on top for an hour or so.
Method 2: A Gentle Hand Wash for a Refresh
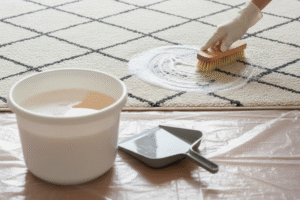
If your rug needs more than a spot treatment, a gentle hand wash can work wonders. This method is great for rugs that are moderately dirty.
What you’ll need:
- A bucket of warm water
- Mild dish soap or a rug shampoo formulated for your rug’s material
- A soft-bristled brush or sponge
- A squeegee or the dull edge of a dustpan
Steps:
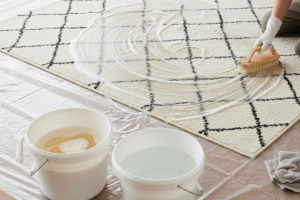
- Mix Your Solution: Fill a bucket with warm water and add the recommended amount of rug shampoo or a small amount of dish soap.
- Scrub Gently: Dip your brush or sponge into the sudsy water and gently scrub the rug in sections. Work in the direction of the rug’s pile. Don’t soak the rug; you just want to agitate the surface fibers.
- “Rinse” the Rug: Empty your bucket and refill it with clean water. Dampen a clean cloth and wipe down the rug to remove the soap residue.
- Remove Excess Water: Use a squeegee to gently push excess water and suds out of the rug, always moving in the direction of the pile. This step is surprisingly effective at removing moisture.
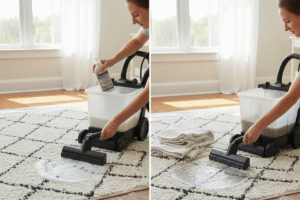
Method 3: Using a Carpet Cleaner
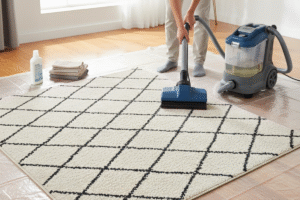
For a true deep clean, a carpet cleaning machine can be very effective. You can rent one from a local grocery or hardware store. This is the best option for heavily soiled synthetic rugs. However, be cautious using it on delicate materials like wool, silk, or antique rugs.
What you’ll need:
- A carpet cleaning machine with an upholstery attachment
- Rug shampoo approved for the machine and your rug type
Steps:
- Follow Machine Instructions: Read the instructions for the carpet cleaner carefully. Fill the tank with water and the appropriate cleaning solution.
- Clean in Sections: Use the upholstery attachment for better control over the amount of water being dispensed. Work slowly in small sections, being careful not to oversaturate the rug.
- Extract Thoroughly: Go over each section again using only the machine’s suction function to extract as much water as possible. This is the most important step for protecting your wood floor. A damp rug is okay; a soggy one is not.
The All-Important Drying Process
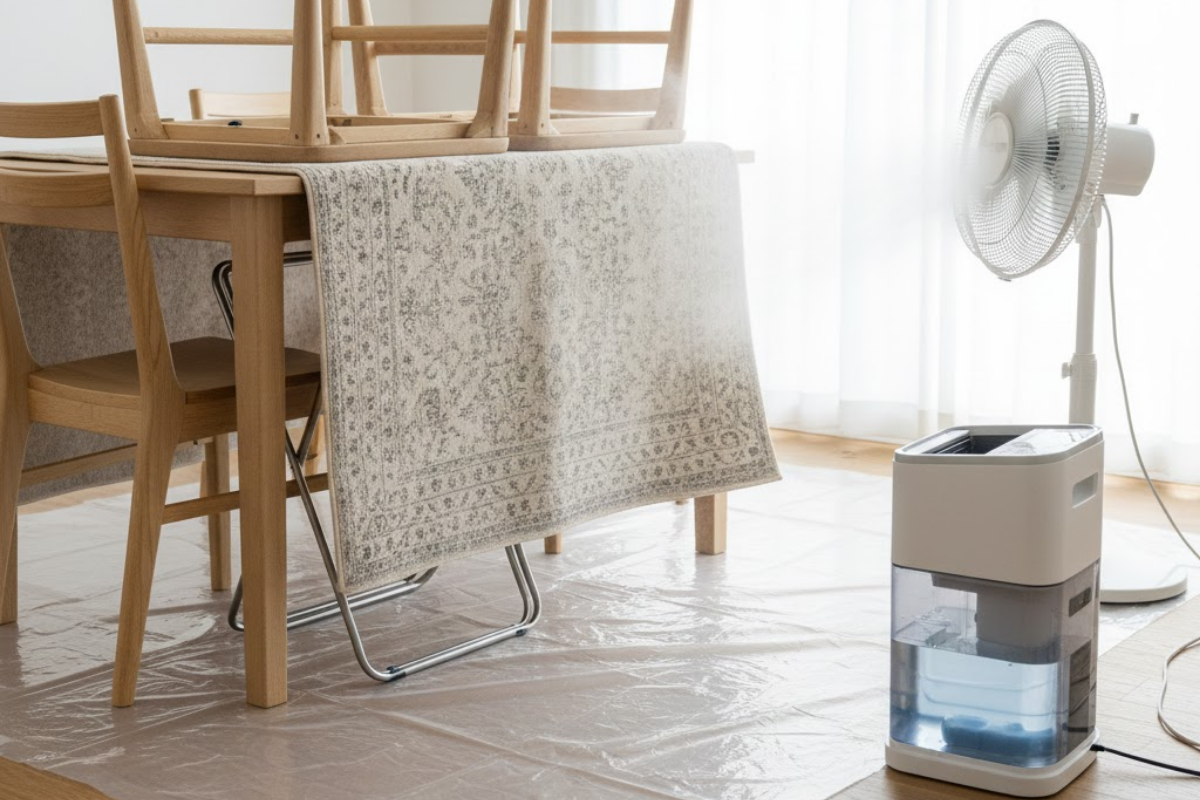
Properly drying your rug is just as important as cleaning it. Trapped moisture can lead to mold, mildew, and damage to your hardwood floor.
- Elevate for Airflow: The best way to dry your rug is to allow air to circulate on all sides. If possible, drape the rug over a sturdy drying rack, a patio railing, or several chairs. This speeds up drying time significantly.
- Use Fans and Dehumidifiers: If you can’t move the rug, leave it on the plastic tarp. Point fans directly at the rug’s surface and, if you have one, run a dehumidifier in the room to pull moisture out of the air.
- Flip and Check: Periodically flip the rug over to ensure the underside is drying as well. Feel the rug—it should be completely dry to the touch before you remove the plastic tarp and place it back on your wood floor. This can take anywhere from 12 to 24 hours.
Common Mistakes to Avoid
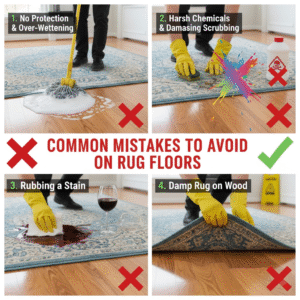
- Skipping the Tarp: Never clean a rug directly on a wood floor without a waterproof barrier. It’s a risk that’s not worth taking.
- Using Too Much Water: Saturation is the enemy. It makes the rug heavy, extends drying time, and increases the risk of mold and floor damage.
- Using Harsh Chemicals: Bleach, ammonia, or other harsh cleaners can strip the color from your rug and damage its fibers. Stick to gentle, approved cleaners.
- Rubbing Stains Vigorously: Rubbing can push a stain deeper into the rug fibers and cause them to fray. Always blot.
- Putting the Rug Back Too Soon: Patience is a virtue. Ensure the rug is 100% dry before putting it back in place.
By following these steps, you can confidently clean your area rug, keeping it fresh and beautiful while ensuring your hardwood floors remain in perfect condition.